Too often people ask me, how do you stay out of the food in your kitchen when you are BAKING all of the time? My response is, “I don’t, I can’t, I eat it all.” But there are ways to make memories in your kitchen without blowing the calorie bank and actually getting your kids involved in the process. These ornaments are not edible, but there is a fair amount of hands-on work to make the experience fun and playful. This time of the year we’re always looking for gifts the children can give to loved ones. These “Memory Ornaments” are so meaningful. They are so easy, use pantry ingredients and your children can be involved in the majority of the process. (*This recipe involves stove top heating, please be careful with little ones.) If your children are a bit older, they can do thumbprints or make a decorative design as well. I plan on painting them with red glitter paint as soon as these puppies dry enough to do so. I’ll paint everywhere but the indentations of the little hands and feet. I think because Halle’s hands are a tad bigger that I will need to reinforce the back of her ornament because it is so large and I don’t want it to crack and break.
Without further adieu, please make these with your little ones soon!
Memory Ornaments (See step by step photos below)
Makes 4 good sized ornaments.
2 c. baking soda
1 c. cornstarch
1 1/4 c. cold water
In a medium sauce pan, mix cornstarch and baking soda, then add water. Cook over medium heat, stirring constantly, until the consistency of wet mashed potatoes. Turn onto a plate, cover with plastic wrap and let cool until warm. Knead until smooth. Seal in plastic bag, in refrigerator or use right away. Divide dough into four pieces. Roll into a ball. Take a flat dinner plate and press onto the dough to approximately 1/4″ thickness. Press the child’s hand/foot evenly into the dough, only going 1/2 way into the dough. Stamp a straw into the ornament where you want to place ribbon for hanging. *Be sure it isn’t too close to the edge. Let dry on a cookie rack for 24-48 hours. (Drying in sunlight will speed it along.) Paint and clear coat if desired. Don’t forget to add the year as well. Enjoy!
Step by step (sort of!)
Place the ingredients into the saucepan, stir until the mixture looks like this.
Pour the mixture out into a bowl and pat into a disk for quicker cooling.
Cover it with plastic wrap.
When it is ready to handle, knead it a bit…
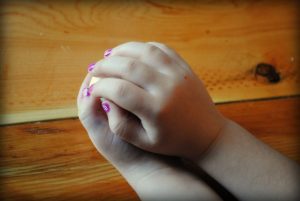
And shape it into a ball. (Thank you Happy Nails for the Mini-Mani on our hand model here.)
Next, grab a plate with a flat bottom and press the ball to 1/4″ thickness.
Push a little harder… (use a rolling pin if necessary to achieve the desired thickness and shape)
And then make your impression with the help of an adult.
Sit back and ogle at how beeee-a-utiful the handprint is… and cry because it will only grow bigger.
Press a straw into the perimeter of your ornament so you can hang a ribbon through it. Grab a trusty scraper if you need to, or spatula to lift your ornament onto a drying rack for 24-48 hours.
Then help your little brother practice ‘smooshing’ his hand down… chubby hands, I love them.
Dry your ornaments for 24-48 hours. Paint and clear coat if desired.


1 Comment